Once the first server of Windows Server 2012R2 has been made into a domain controller you have a domain database called Active Directory that holds all user, group, and comptuer information for that domain. In a prior post I outlined how to create a domain controller. The domain was called Contoso.com, and DC1 is the Forest root domain controller for that domain. In order for people to log on and use this domain, their user accounts must be created in the Active Directory database of the domain controller. Ideally, you should already have list of users with their respective funtions or titles, and/or departments they belong to on hand so you know how to organize them in Active Directory. What users are allowed to do, and resources they will have access to will be determined be their function or group membership. So if there is a way to get this, get it.otherwise compille it. Here is a sample list of users, their function, and group membership.
List of UsersFunction Department or Group
Andres RiveraAdministrator/ITIT Department
Richard PliskaSalesSales Department
Diana FergussonSalesSales Department
Tony AlfrescoSalesSales Department
Susan LlerenaSalesSales Department
Eric SobannSalesSales Department
Robert FullerSales ManagerSales Department/Managers
Frederica MuñozAccountantAccounting Department
Elizabeth AcevedoAccountantAccounting Department
George SmithAccountantAccounting Department
Gregory HellerAccounting ManagerAccounting Department
Anita ShearHR ManagerHR Department
Ashley ThomasHR HR Department
Sable FontHR HR Department
John Phillips CullenDirector of OperationManagers Group
It is best to create the groups first, then create templates for user accounts in each group, that include menbership, then copy the template when creating each user. Some users will belong to multiple groups, copy the template for the users principle group then add the other user group by hand.
In this post we use Fedora’s built-in built in remote control progam VNC to connect to another Fedora host that has been preconfigured to receive uninvited connections.
The DHCP Server role is probably the most important part of the network infrastructure. It is the reason you are able to quickly get to resources on your local area network, and the internet. Besides assigning each computer, or mobile device a unique number called an IP address, it tells each of those devices where to go to find other servers, or services necessary for a network to function. To acomplish this you must program the DHCP server service with IP address for every host on the network, as well as information about the DNS server for name resolution, and gateway device, that lets devices get out to the internet. To install and configure DHCP follow these steps:
Log on to your server as administrator
Allow the Server Manager to load
From the Server Manager click Add roles and features
If prompted with the Before your begin screen click next.
On the Select Installation type ensure Role-based or feature-based installation is selected, and click next
On the Select destination server, click the server that you want to install DHCP on the click next. In our example there is only one server which is highlighted (DC1.contoso.com)
From the Select server roles page check the box for DHCP server. Click the Add features button to continue, then click next to go on to the next page.
On the Select features page click Next to continue
On the DHCP Server page click Next to continue
On the Confirm installation selections page click Install to continue
The Installation page display the installation progress. Once the Installation progress page reports: Configuration required. Installation succeeded on your computer, click close
On the Server Manager click the notification flag with yellow triangle.
From the resulting menu select Complete DHCP configuration
On the resulting Description page click Next to continue
On the Authorization page, Use the following credentials should be selected with an administrative account. In our example we started the procedure with CONTOSOAdministrator. Click commit to continue, then click close
Now go to the Server Manager and from the tools menu select DHCP
On the DHCP console all nodes until you see the contents of the IPV4 node
Right mouse click on the IPv4 node and select New Scope from the context menu.
Click Next on the Welcome screen to continue
On the scope name type Scope 1, although this could have any name, like subnet1, subnet2, or subnet3. Scope one will do for this example. Click Next to continue
On the IP address range type the starting IP address of the range IP addresses you intend to assign, for this example we’ll use 192.168.0.1, then type the last IP address you intend to assign. In this example we’ll use the last assignable address in this class of IP: 192.168.0.254. Click Next to continue
On the exclusion range we’ll enter the IP address: 192.168.0.200 and click Add . This prevents the DHCP server from assigning this IP address to another host, thus avoiding an IP address conflict. You could at this point add additional host IP addresses that have already been configured on other hosts such as printers or routers. For this example we’ll assume this is the only host of the range that has been assigned. Click Next to continue
On the lease duration you can configure how many days, hours, or minutes an IP address is good for. The default value is good for this example. Click Next continue
On the Configure DHCP Options, click Yes, I want to configure these options now, then click Next to continue
On the Router(Default Gateway) page we’ll use this computers IP address, on the assumption that this computer will be the gateway for other computers to get to the Internet. In reality, the IP address pertains to a device such as Cisco router that sits between you LAN, and the Internet. Click Next to continue
On the Domain Name and DNS Search page, values should be pre-populated as this machine has already been configured as a Domain Controller, and as such would know these values. Accept them and click Next to continue.
On the WINS server page click Next to continue.
On the Activate Scope page, click Yes, and click Next to continue
On the Completing the New Scope Wizard page, click Finish to finish the DHCP configuration process.
Your DHCP server is now configured and serving IP addresses.
In this post, I demonstrate how to install Active Directory Domain Services on a freshly installed Windows Server 2012R2 Server. If you missed the previous video, you can watch it at the following link: Windows Server 2012 Prelimary configuration steps. Watch this video to prepare a Windows Server to be pre-configured for installation as a Domain Controller. After the preliminary steps for the server have been done. Follow these steps:
Log on to the server as administrator
Wait for Server Manager to load.
From the Server Manager Dashboard click number 2 Add Roles and Features
On the Before you begin screen click Next
On the select Installation type ensure that Roles-based or Features-based Installation is selected and click next
On the select Destination Server screen ensure that your target server name is highlighted. In our example that is DC1, then click next.
From the select server roles list select Active Directory Domain Services.
On the Add Roles and Features Wizard pop-up box select Add Features
On the Select Server roles screen, click next
On the Select Features screen, click next.
On the Active Directory Domain Services screen, click next
On the Confirm installation selections screen, check the box to Restart the destination server automatically if required, and click Yes on pop up dialog box.
The installation starts. You can monitor progress on blue bar that is going across.
When the progress bar reaches the end on the Installation Progress screen, notice just beneath the bar, the message that Configuration required, Installation succeded on DC1.
Click on close for the screen, and move your mouse to the top of the Server Manager screen, then click on white flag with the yellow triangle and exclamation point in it. This reveals a menu items that still need to be performed for the installation to be complete. From the resulting menu select the blue link Promote this server to a domain controller, a screen called Deployment Configuration is presented with three options.
Select Add a new forest, then under Specify the domain information for this operation, type your domain name, in this instance where are using Contoso.com, then click next.
On the Domain Controller Options screen type the Directory Services Restore Mode password, and confirm, then click next.
On the DNS Options screen, click next
On the Additional Options screen, wait for the NetBIOS doamin name to be populated. It should say CONTOSO. Click next to go the next screen.
On the Paths screen, leave defaults, and click next.
On Review Options, review your selections, and click next.
Wait for the Prerequisites Check screen to finish populating. then click the Install button to continue
The Installation screen displays progress on your installation. Wait for it to finish.
You’ll get a banner indicating the computer is about to restart.
The computer restarts
Log on to your domain controller, and verify that Active Directory and DNS where installed correctly.
Wait for Server Manager to load.
Notice the additional items listed on the left column. One for ADDS Active Directory Domain Service, and another DNS for Domain Name Service.
Click ont the tools menu in Server Manager. Note the addition of five new entries for Active Directory
Click the DNS on the tools menu.
On the DNS manager expand DC1, then expand forward lookup, then Contoso.com
Click on the contoso.com object and notice the DC1 server in the list of records
Close the DNS Manager
From the tools menu on Server Manager select Active Directory Users and Computers.
On the Active Directory Users and Computers console, expand contoso.com, then click on the Domain Controllers object in the left column. Notice DC1 in the Domain Controllers object.
Close the Active Directory Users and Computers Console.
We have succesfully installed and verified a doman contoller in the contoso.com domain.
Once a Windows Server is installed, there some basic changes that need to be done before configuring it for ulitmate duty. These are:
Configure a static IP address. Servers don’t usually receive their IP address dynamically like other workstations like Window XP, Vista, 7, or 8.
Configure the time zone. Necessary for time sensitive tasks. Configure the time zone first, then correct the date and time if necessary.
Enable remote desktop. In all likelyhood once you configure the server, you will not touch it physically anymore. With Remote Desktop Enabled, and the IP address of the server you can remotly connect and do whatever you need from your Windows workstation Remote Desktop Connection client.
Finally the last thing to do is change to computer name to something more intuitive than WIN-XXXXXXX. Once this is done you can connect to it in the Windows explorer or Remote Desktop client with the simple computer name such as DC1, or SQL1
Stay tuned for the next video whree we take this server and make it a domain controller.
When using Fedora13, you will probably want to connect and use resources from Windows computers. To do this you will need enable Samba, a utility that makes Linux use SMB’s (Server Message Blocks) the protocol Windows uses to comunicate with other Windows computers. Most modern Linux distros have this functionality built-in, but in early editions of Fedora13 it does not. Here how to enable it:
Log in to your Fedora13 machine
From the Applications Menu select System Tools, then select Terminal
In the Terminal session type: su to elevate you to super user.
Provide to Super user password.
From the new prompt type: yum install samba
Allow the program to download and install. If prompted to install additional software type y, and press Enter.
Once the installation is finished and you are returned to the command prompt, goto the System Menu, and select Administration, then select services.
On the services console locate and enable smb. Once enabled close the services console.
From the System menu, select Administration, then select Firewall. Provide root credentials when prompted.
From the firewall console locate and click the check boxes for Samba, and Samba Client. Click Apply on the menu bar to enable. Close the Firewall console.
To test the networks functionality goto Places menu and select Network.
Right mouse click Windows Networks and select open from the context menu.
You should see a series of computers or workgroups.
From the Applications menu, select “System Tools”, then select Terminal
On the terminal screen type: “su”, then provide your root password
Now on the command prompt type: yum install xrdp
Allow the software to download and install. If prompted to install additional software, type “y” to proceed. Allow them software to finish downloading and install software. Leave the terminal window open.
After the software installs go to the “System” dropdown menu and select “Administration”, then select “Services” from the submenu.
On the services console locate and highlight the xrdp service. Click the enable button on the toolbar. Once the color changes to green exit the services console.
From the System dropdown menu select “Administration”, then select, Firewall from the submenu.
Click “close” on the configuration popup. Provide root password on the Authenticate Popup.
On the left column locate and highlight “Other ports” on the Firewall console.
Click “Add” on the right side of the Firewall console
From the Port and Protocol dialog box, locate, highlight, and doubleclick port 3389 tcp. The click Add again, and locate, highlight, and doubleclick 3389 udp. Once added, click Apply on the menubar.then exit the Firewall console.
Go back to the open terminal window used previously to install xrdp.
Type reboot on the terminal window. Allow the computer to reboot.
Log back into your computer.
From the Applications menu select “System Tools”, then “Terminal”
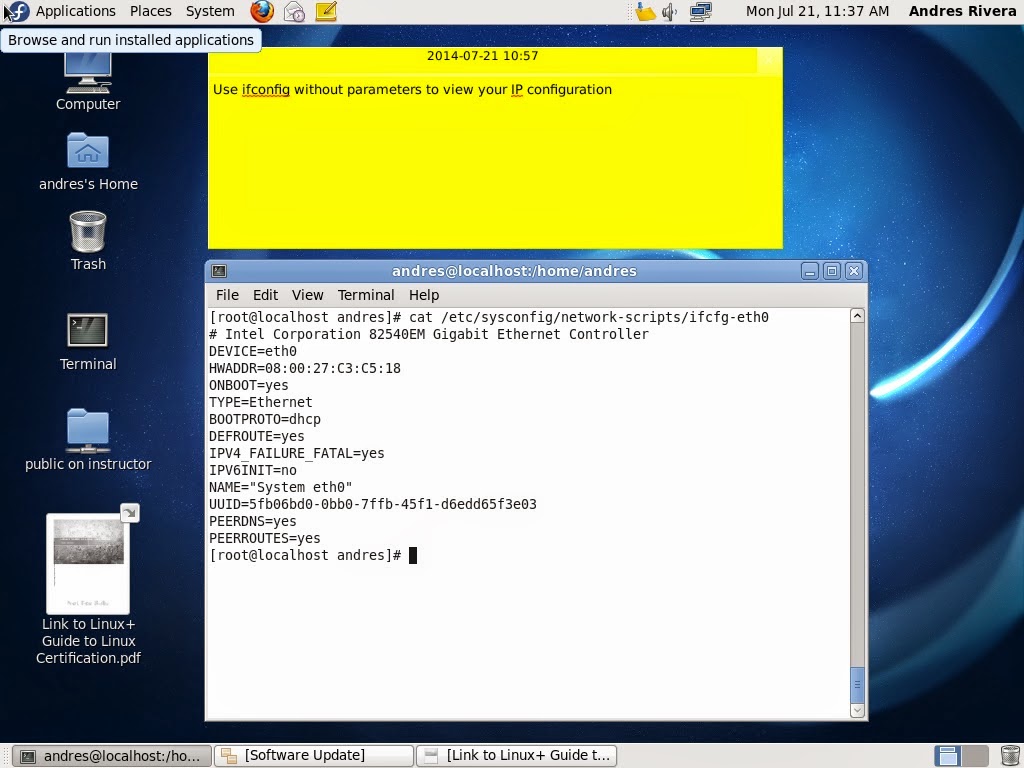
On the terminal windows type: ifconfig and press Enter. Your IP address will show for the eth0 adapter. This the number you must use to connect to the XRDP server on your linux box from your Windows workstation.
Now go to a Windows computer and locate Remote Desktop Connection program.
Type the IP address obtained from the Linux computer.