A web server on Windows 7 Pro

FacebooktwitterlinkedinmailFacebooktwitterlinkedinmail

Windows has always had the abitlity to share files and printers with other Windows PCs, and Macs. But did you know that you can have a web server as well? You can if you Windows PC is Windows XP Professional, Windows 7 Professional, or Windows 8 Pro. Let get right to installing the web server in Winodws 7.

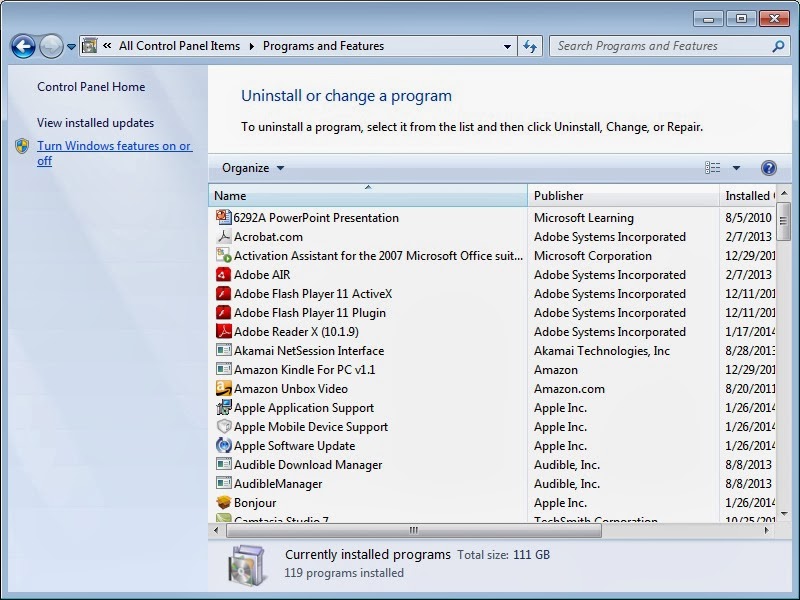
First, go to the control panel and find programs and features.

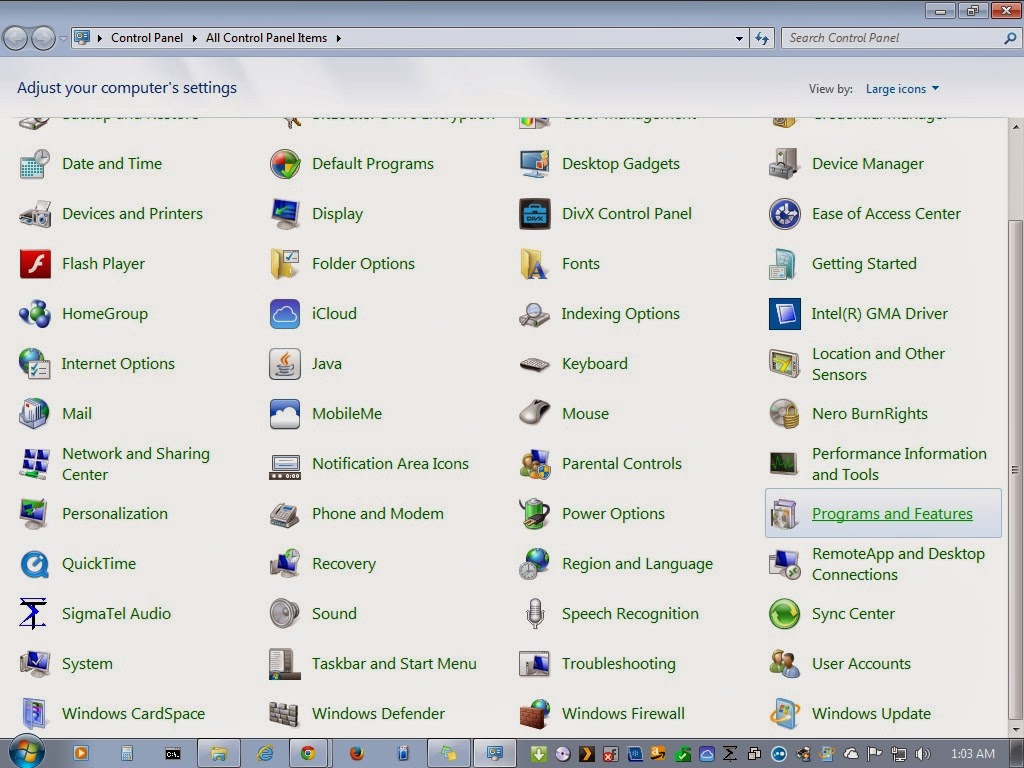
Click Turn on Windows features on or off.

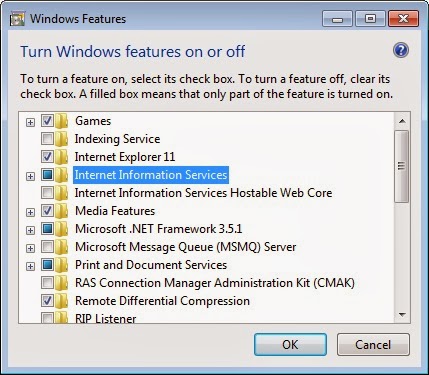
Select Internet Information Servicies, and click ok.

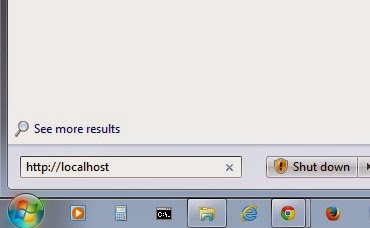
Once installed you can test the installation by typing the following on the search line. http://localhost

If installed correctly you should get the IIS (Internet Information Services) Logo.

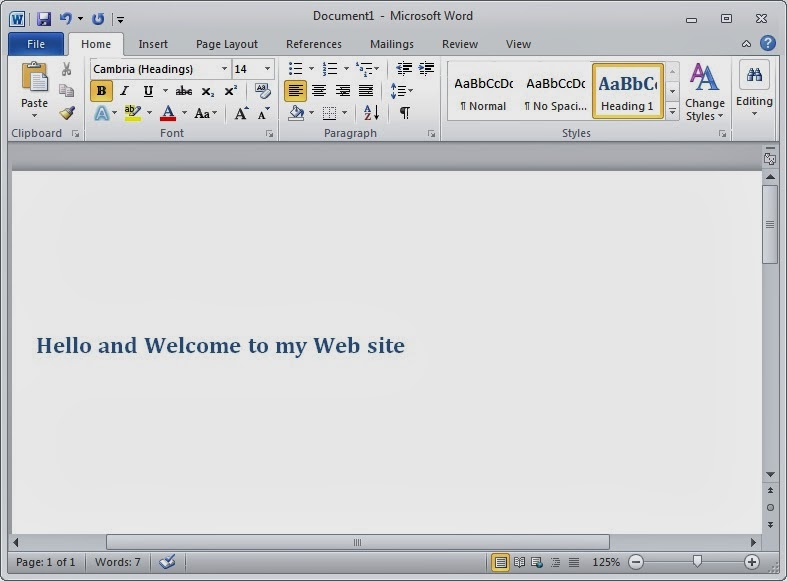
Now all you have to do is create content and drop it in the folder: C:InetPubwwwroot. If you have Microsoft Word create a document and save it your My Documents Folder.

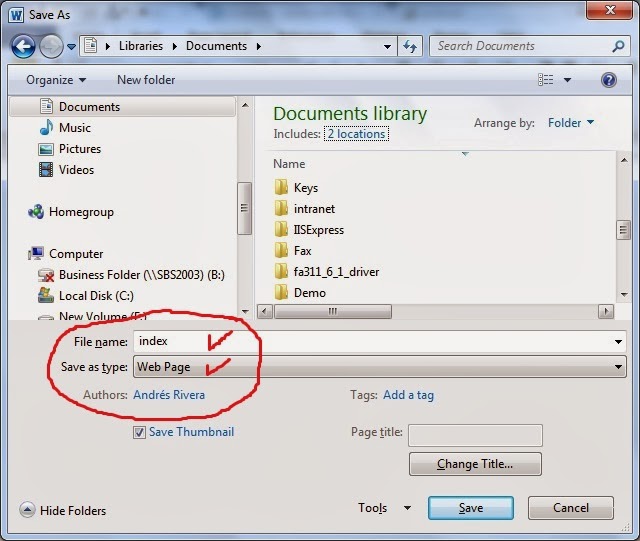
Be sure to select “Web Page” from the Save as Type drop down menu. and use index as your file name. Click save.

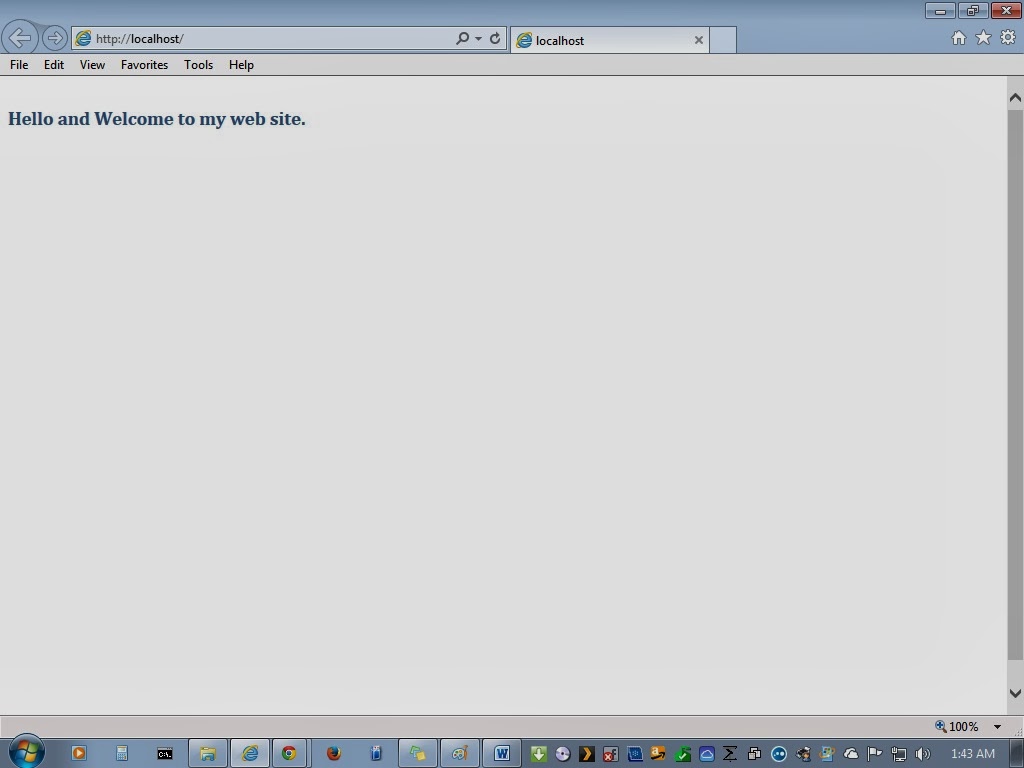
Copy the index.htm file and the index folder from my docuemnts to c:inetpubwwwroot. Acknowledge the security warning, you may need to provide administrative credentials. Now test by typing the following on the search line

The copied page display from your web server

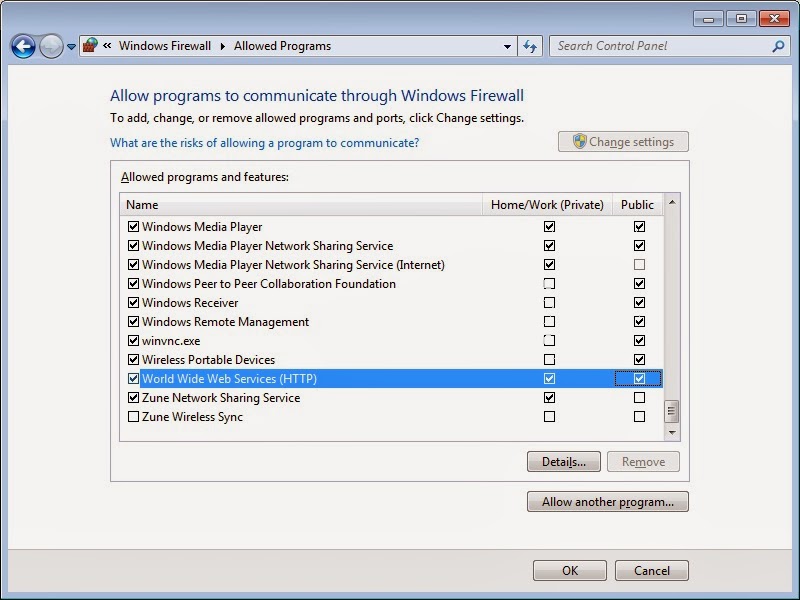
As you can see it is easy to install and use the Windows Web server. If you want to share this content with your workgroup just have your workgroup computers connect to your computer using your computers name or IP address from their search line. First allow the web server through your firewall. Click allow a program or service through the firewall.

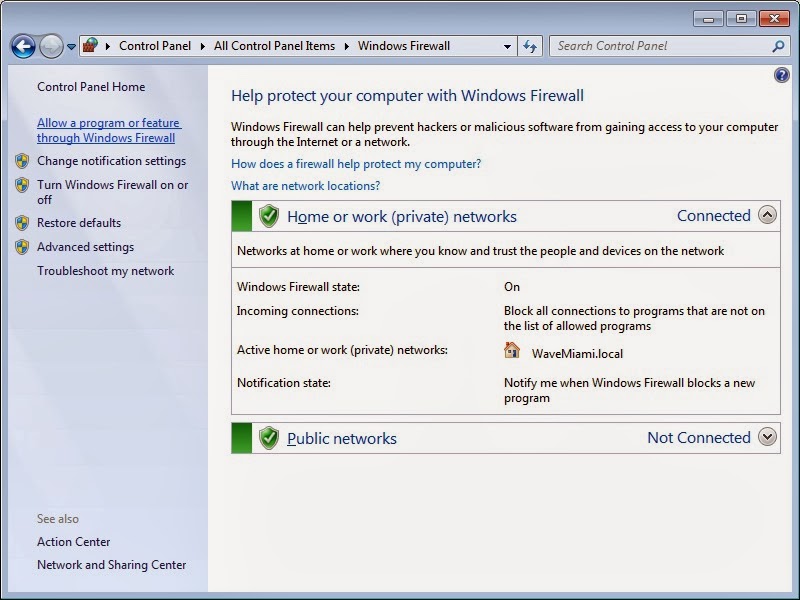
Click change setting, scroll to the bottom and select web server checkboxes as shown, then click OK.

Now type URL for the computer serving the web page from another computer in the workgroup. Example:

 http://172.16.0.5

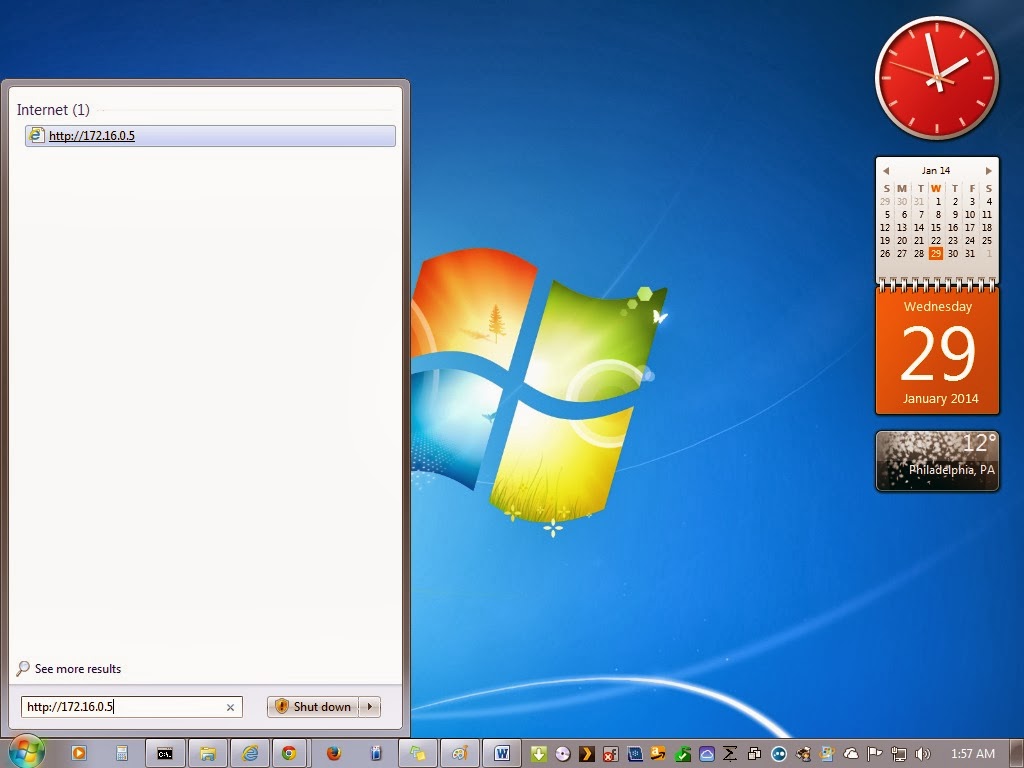
The page is delivered to this workstation from the web server.

Pretty cool huhh! This is quick and easy way to publish information to your workgroup from your computer without having to involve IT, or get pay for hosting.

Migrating settings using Windows Easy Transfer

FacebooktwitterlinkedinmailFacebooktwitterlinkedinmail

In this post I’ll discuss migrating settings and favorites from your old computer to your new computer using Windows 7 Windows Easy Transfer tool. First, go to the Start menu, and select Windows Easy Transfer from the System Tools submenu of Accesories menu.

The Windows Easy Transfer Welcome screen appears. This tool will transfer the information that you select from the choices presented on screen. Click Next to continue

You will be given a choice to transer information using an Easy Transfer Cable, a network, or an external hard disk or USB flash drive.

For this example I’ll be choosing the network option because it is readily available to me. Although the you could use an external hard drive. I think it is easier to to use either the easy transfer cable or the network, since the data to be transfered does not have to be transferred to the hard drive, then to the new computer, so you save some time.

When I click on the network button, I get the screen below. In this example I’ll be transfering from an Windows XP computer, so you must run the tool from Windows 7 first, and therefore I’ll select “This is the new computer”.

After I select the new computer, I get asked if I need to install Windows Easy Transfer on the old computer. I’ll select “I need to install it now”. If the old computer is running Windows 7 you don’t need to install the tool.

Once I select “I need to install it now” I get prompted for the location of to copy the Windows Easy Transfer tool on the screen below.

I will select the External Hard disk or Network folder.

From here you may browse for the folder that you intend to use to copy the Windows Easy Transfer tool so it can be installed on Windows XP. I will create a folder on central network location I established for my shared files. Note: Use a folder that you have permissions to write to. READ ONLY folders won’t work!

Click Ok once you have chosen the folder

The Windows Easy Transfer tools is copied to the network location

Now, on the old computer you will connect to the network location where Windows Easy Transfer was copied to, and install it on the old computer.

Double click on Windows Easy Transfer tool Icon.

Windows Easy Transfer tool installs

The Windows Easy Transfer tool runs on Windows XP

Click Next to start the Wizard on WindowsXP

Select Network Location

Select “This is my old computer”

You will get instructions on screen to go to your old computer and enter a code to connect to the new computer

On the new computer enter the code provided on the old computer, and click next

Windows checks for updates to Windows Easy Transfer

Windows scans for what can be transferred. This can take some time.

Choose what profile to transfer from the old computer, then click transfer. You may want to uncheck profiles that you do not intend to transfer, for instance  profiles that contain large My Document files, and or service packs for the old computer that are not relevant to the new computer.

Windows Easy Transfer copies information from old computer to new.

The transfer completes and prompts you to see what was transferred, and suggest programs you may need to install to support transfered data files, such as Microsoft office files.

On your old computer you can close the dialog box.

On the new computer you can click on “see what was transfered”, and inspect the transfer report, and the program report to see what else may need to be done on the new computer to support the transfered data.
On the new computer close the Windows Easy Transfer tool.

You are prompted to restart the computer to complete the transfer. Click “Restart now”.

Using VMWare Workstation

FacebooktwitterlinkedinmailFacebooktwitterlinkedinmail

In my last post we looked at the Virtual Box from Oracle. In this post we will look at using VMWare workstation to create a virtual machine running Windows Server 2008. The first thing you will need is the VMWare workstation software. You can obtain a trial copy from their download page. At the time of this posting I was using Workstation Version 8. There is also a VMWare Player with less capabilities than the workstation product, but for the purposes of this demo I will use VMWare Workstation.

To create a virtual machine the link “Create new Virtual Machine”

The Welcome to the New Virtual Machine Wizard pops up. Click next to continue

Keep the default selection of “I will install the operating system later”, then click next.

Ensure that Microsoft Windows is selected then from the drop down version list choose Server 2008, and click next.

On the Name Virtual Machine Dialog box, accept the default name and choose next. Note that you may choose the file location of the virtual machine. By default the virtual machine files are saved in a folder called Virtual Machines under your profile folder.

On the specify disk capacity dialog box, select “Store virtual disk as a single file. Then click next.

On the Ready to create virtual machine dialog box, you’ll get a summary of the settings selected during the wizard, you can customize hardware here, but for now just click Finish.

At this point you must provide the operating system CD that will be used to install Windows Server 2008. Click “CD/DVD” to provide the DVD or DVD iso file for Windows Server 2008.

If you where going to use a DVD, you would leave the default setting of auto detect on the right hand side of the dialog box. Because I will be using an ISO file downloaded from Microsoft, I will select the “Use ISO image file” selection.

Once the source DVD or ISO has been chosen, click OK

Notice how the summary now shows the selected ISO file. Click the power on this virtual machine green triangle.

You would now click inside the virtual machine window and click next to follow the installation routine like any other computer.